Title here
Summary here
Untuk keamanan akses aplikasi simgos2, maka hal yang harus dilakukan:
passwd rootsimgospasswd simgossimgos# Ubah kalimat ganti_dgn_password_baru
find /opt/tomcat/conf -name "tomcat-users.xml" -exec sh -c 'x={}; sed -i -e "s/password=\"5!MG052\"/password=\"ganti_dgn_password_baru\"/g" "$x"' \;
# Restart tomcat
systemctl restart tomcatHeidiSQLPerkakas -> Manajer PenggunaadminSandi p: dan Ulangi Password:Simpan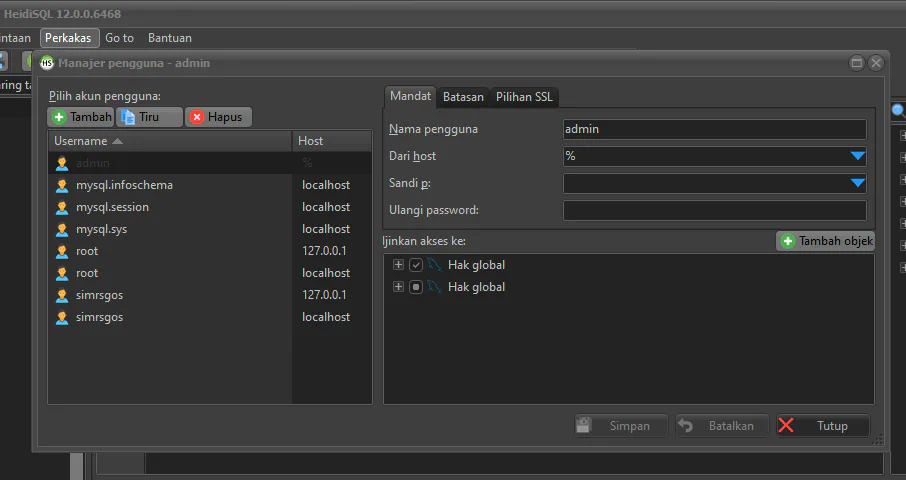
Setting ServerName
nano /etc/httpd/conf/httpd.confCtrl+W untuk melakukan pencarianServerName Tekan Enter# (uncomment)www.example.com:80 menjadi simgos2Ctrl+X+Y+Enter untuk menyimpan perubahanDisable Document Root
nano /etc/httpd/conf/httpd.conf# (comment) diawal scipt dibawah iniDocumentRoot "/var/www/html" menjadi #DocumentRoot "/var/www/html"<Directory "/var/www">
AllowOverride None
# Allow open access:
Require all granted
</Directory>menjadi
#<Directory "/var/www">
#    AllowOverride None
#    # Allow open access:
#    Require all granted
#</Directory><Directory "/var/www/html">
#
# Possible values for the Options directive are "None", "All",
# or any combination of:
# Indexes Includes FollowSymLinks SymLinksifOwnerMatch ExecCGI MultiViews
#
# Note that "MultiViews" must be named *explicitly* --- "Options All"
# doesn't give it to you.
#
# The Options directive is both complicated and important. Please see
# http://httpd.apache.org/docs/2.4/mod/core.html#options
# for more information.
#
Options FollowSymLinks
#
# AllowOverride controls what directives may be placed in .htaccess files.
# It can be "All", "None", or any combination of the keywords:
# Options FileInfo AuthConfig Limit
#
AllowOverride None
#
# Controls who can get stuff from this server.
#
Require all granted
</Directory>menjadi
#<Directory "/var/www/html">
    #
    # Possible values for the Options directive are "None", "All",
    # or any combination of:
    #   Indexes Includes FollowSymLinks SymLinksifOwnerMatch ExecCGI MultiViews
    #
    # Note that "MultiViews" must be named *explicitly* --- "Options All"
    # doesn't give it to you.
    #
    # The Options directive is both complicated and important.  Please see
    # http://httpd.apache.org/docs/2.4/mod/core.html#options
    # for more information.
    #
#    Options FollowSymLinks

    #
    # AllowOverride controls what directives may be placed in .htaccess files.
    # It can be "All", "None", or any combination of the keywords:
    #   Options FileInfo AuthConfig Limit
    #
#    AllowOverride None

    #
    # Controls who can get stuff from this server.
    #
#    Require all granted
#</Directory>Ctrl+X+Y+Enter untuk menyimpan perubahanRemove File welcome.conf
rm -rf /etc/httpd/conf.d/welcome.confRemove Indexing
find /etc/httpd/conf.d -name "*.conf" -exec sh -c 'x={}; sed -i -e "s/Indexes //g" "$x"' \;Add Header
nano /etc/httpd/conf.d/headers.conf

# Tambahkan script dibawah ini ke dalam file headers.conf
Header set X-Frame-Options: "SAMEORIGIN"
Header set Strict-Transport-Security: "max-age=31536000; includeSubDomains"
Header set Content-Security-Policy: "default-src 'self' http: https: ws: wss: data: blob: 'unsafe-inline' 'unsafe-eval'; img-src http: https: data: blob:"
Header set X-Content-Type-Options: "nosniff"
Header set Referrer-Policy: "strict-origin-when-cross-origin"
Header set X-Xss-Protection: "1; mode=block"
Header set Permissions-Policy: "camera=(), microphone=(), geolocation=()"
Restart service
# Cek jika konfigurasi OK
httpd -t

# Jika Ok lakukan restart service
systemctl restart httpdGenerate Local Self Certificate
cd /home/simgos
mkdir certs

cd certs

# Download genssc
wget http://simgos2.simpel.web.id/repos/scripts/genssc.sh
chmod +x genssc.sh

# Generate file config kemudian edit file config.cnf dan sesuaikan pengisian fieldnya
./genssc.sh config
Setelah generate config lakukan edit file config.cnf
nano config.cnfnama propinsi sesuai dengan nama propinsi faskeskota/kab sesuai dengan kota/kab faskeskoders menjadi kode faskes kemenkesnama rs menjadi nama faskes masing - masingInstalasi SIRS menjadi nama unit kerja sistem informasics@rs.com sesuai dengan email rsnama server sesuai dengan nama server simgos2ip address sesuai dengan ip server simgos2Selanjutnya simpan perubahan tersebut dengan menekan tombol Ctrl+X+Y+Enter. Setelah disimpan lakukan generate certificate seperti perintah dibawah ini:
# Generate Certificate
./genssc.sh certificate
Melakukan konfigurasi pada web server apache
ssl.confKetik perintah dibawah ini:
# Edit file ss.conf
nano /etc/httpd/conf.d/ssl.confSSLCertificateFile /etc/pki/tls/certs/ca.crt menjadi SSLCertificateFile /home/simgos/certs/server.crtSSLCertificateKeyFile /etc/pki/tls/private/ca.key menjadi SSLCertificateKeyFile /home/simgos/certs/server.keysystemctl restart httpdAllow Firewall to Access Https
firewall-cmd --permanent --add-service=https
firewall-cmd --reload
Import certificate di komputer client
server.cert dari server ke clientWindows+Rcertmgr.msc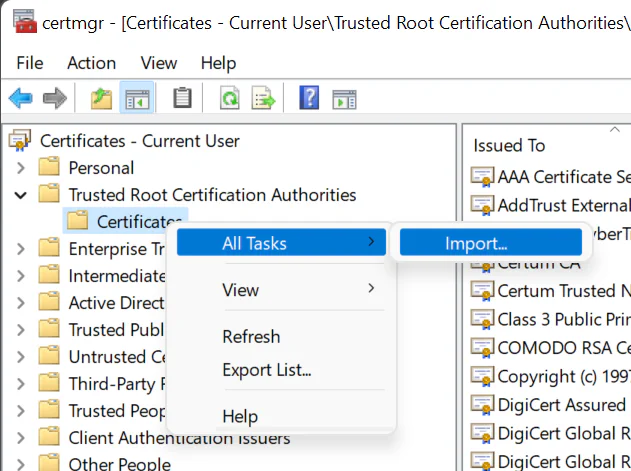
Pilih Trusted Root Certification Authorities, klik kanan di Certificated pilih menu All Tasks -> import
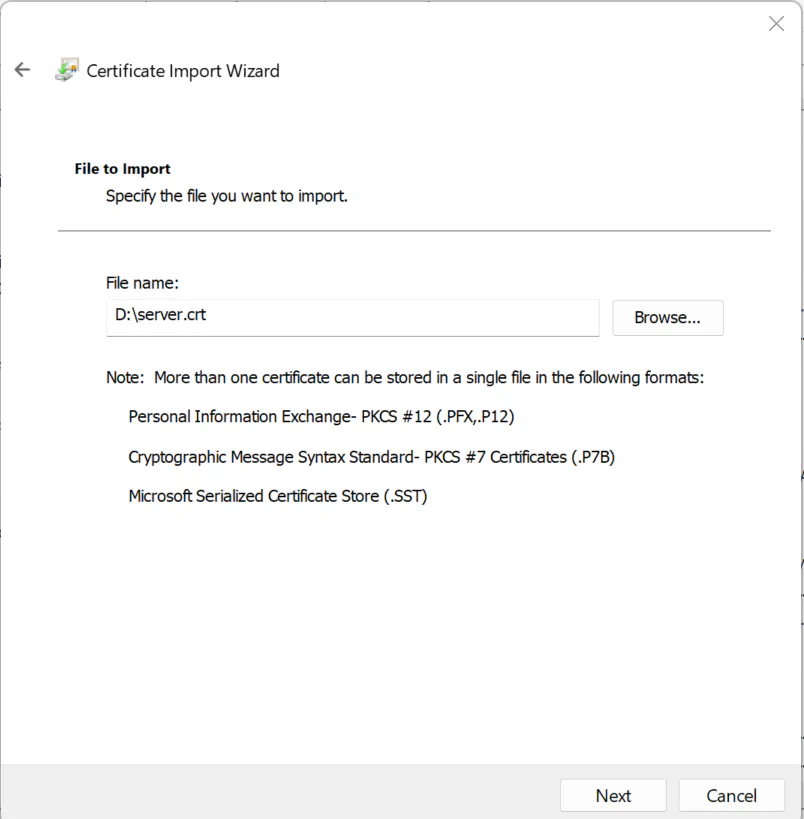
Klik Browser cari file server.crt, selanjutnya tekan tombol Next
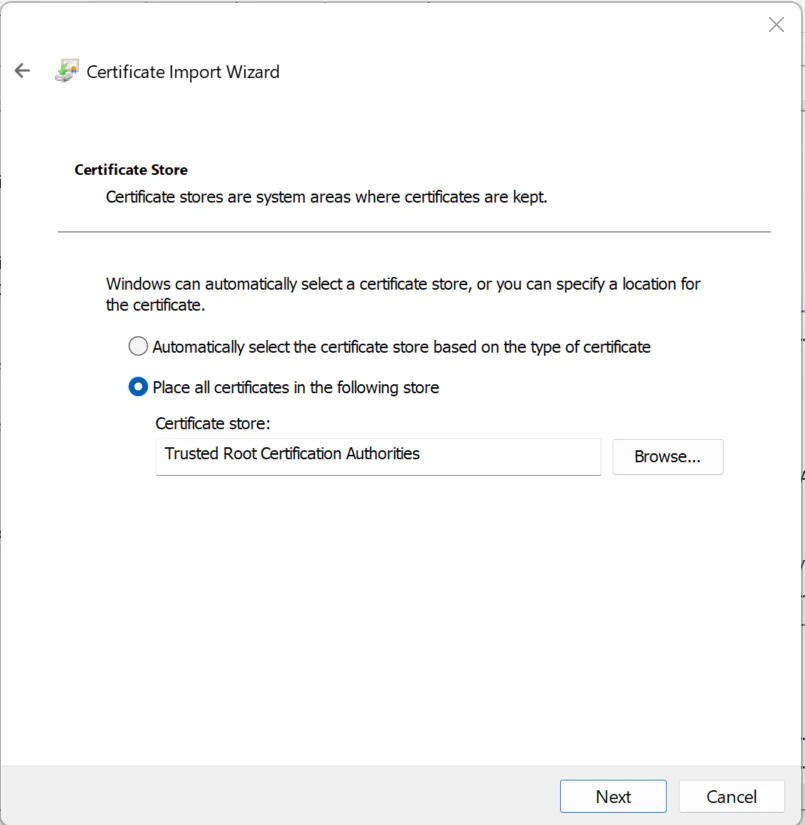
Tekan tombol Next kemudian tekan tombol Finish
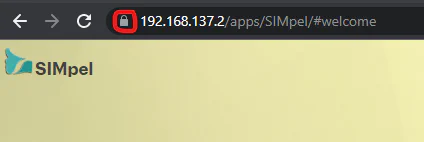
chrome atau Microsoft Edge untuk mengakses aplikasi simgos2